The Ultimate Guide to Replacing Your Keurig Filter: A Step-by-Step Breakdown

The Ultimate Guide to Replacing Your Keurig Filter: A Step-by-Step Breakdown

The Ultimate Guide to Replacing Your Keurig Filter: A Step-by-Step Breakdown

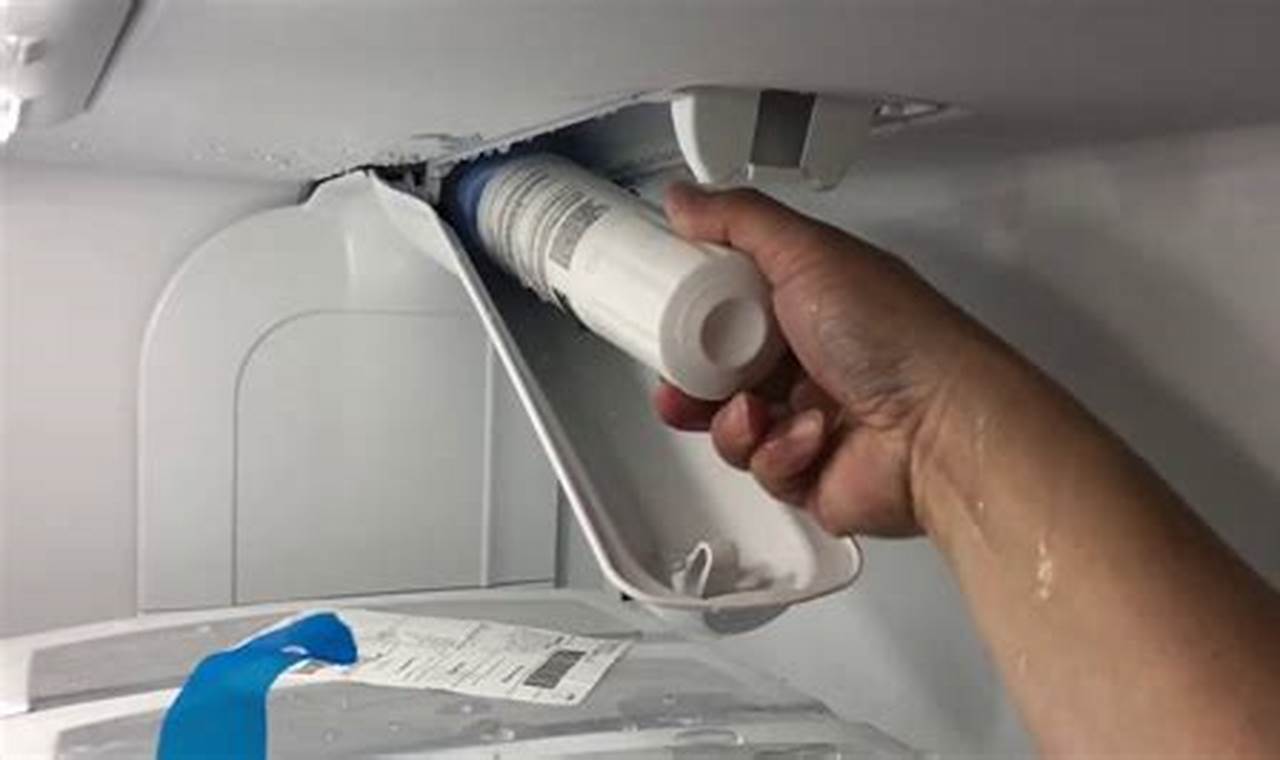
Replacing the filter in your Keurig coffee maker is an important part of maintaining your machine and ensuring that your coffee tastes its best. A clean filter will remove impurities from your water, which can affect the taste of your coffee. It will also help to prevent scale buildup, which can damage your machine over time.

It is recommended that you replace your Keurig filter every 2-3 months, or more often if you use your machine frequently. Replacing the filter is a quick and easy process that only takes a few minutes. Here are the steps on how to replace Keurig filter:

Read more

The Ultimate Guide: How to Replace a Keyboard on a Gateway Gwtn156-1rg Laptop

The Ultimate Guide: How to Replace a Keyboard on a Gateway Gwtn156-1rg Laptop

The Ultimate Guide: How to Replace a Keyboard on a Gateway Gwtn156-1rg Laptop

Replacing the keyboard on a Gateway Gwtn156-1rg laptop involves removing the old keyboard and installing a new one. The process requires careful attention to detail and some technical knowledge. To begin, power down the laptop and unplug it from any power source. Close the lid and flip the laptop upside down. Locate the screws that secure the keyboard to the laptop chassis and remove them. Gently lift the keyboard up and away from the laptop, being careful not to damage any of the delicate components underneath. Disconnect the keyboard cable from the motherboard and remove the old keyboard.

To install the new keyboard, align it with the mounting brackets on the laptop chassis and gently press it down until it snaps into place. Reconnect the keyboard cable to the motherboard and secure the keyboard with the screws. Flip the laptop over, open the lid, and power it on. Test the new keyboard to ensure that it is functioning properly.

Read more

The Ultimate Guide: How to Replace Your Simpure Filter

The Ultimate Guide: How to Replace Your Simpure Filter

The Ultimate Guide: How to Replace Your Simpure Filter

Replacing a Simpure filter is a simple process that can be completed in a few minutes. By following these instructions, you can ensure that your Simpure water filter is functioning properly and providing you with clean, healthy water.

To replace the filter, first turn off the water supply to the filter. Then, use the filter wrench to loosen the filter housing. Once the housing is loose, remove the old filter and insert the new filter. Finally, tighten the filter housing and turn on the water supply.

Read more

The Ultimate Guide to Replacing a Bathroom Sink Like a Pro

The Ultimate Guide to Replacing a Bathroom Sink Like a Pro

The Ultimate Guide to Replacing a Bathroom Sink Like a Pro

Replacing a bathroom sink is a relatively simple plumbing project that can be completed in a few hours. It is a great way to update the look of your bathroom without having to spend a lot of money. Plus, it is a project that most do-it-yourselfers can handle.

There are a few reasons why you might need to replace your bathroom sink. Maybe the old sink is cracked or chipped. Maybe it is the wrong size or shape for your bathroom. Or, maybe you just want to update the look of your bathroom. Whatever the reason, replacing a bathroom sink is a relatively easy project that can be completed in a few hours.

Read more

The Ultimate Guide: How to Replace the Radio in a 2008 Ford Taurus

The Ultimate Guide: How to Replace the Radio in a 2008 Ford Taurus

The Ultimate Guide: How to Replace the Radio in a 2008 Ford Taurus

Replacing the radio in a 2008 Ford Taurus is a relatively simple process that can be completed in about an hour. By following these step-by-step instructions, you can save yourself the time and expense of taking your car to a mechanic.

Before you begin, you will need to gather a few tools, including a Phillips head screwdriver, a flat head screwdriver, and a wire cutter/stripper. You will also need to purchase a new radio that is compatible with your car.

Read more

The Ultimate Guide to Replacing Your Heater Core: A Step-by-Step Tutorial

The Ultimate Guide to Replacing Your Heater Core: A Step-by-Step Tutorial

The Ultimate Guide to Replacing Your Heater Core: A Step-by-Step Tutorial

Replacing a heater core is a task that can be completed by most do-it-yourselfers with the right tools and a little bit of time. A heater core is a small radiator that is located inside the dashboard of your vehicle. It is responsible for providing heat to the interior of the car by circulating hot coolant through its tubes. Over time, heater cores can become clogged or damaged, which can lead to a loss of heat output. If you are experiencing a lack of heat in your car, it is possible that your heater core needs to be replaced.

There are several benefits to replacing your heater core. First, it will restore heat to your car’s interior, making it more comfortable to drive in cold weather. Second, it can help to prevent your windshield from fogging up, which can improve visibility and safety. Third, it can help to extend the life of your engine by preventing it from overheating.

Read more

The Essential DIY Guide: How to Seamlessly Replace Your Bicycle Tube

The Essential DIY Guide: How to Seamlessly Replace Your Bicycle Tube

The Essential DIY Guide: How to Seamlessly Replace Your Bicycle Tube

Replacing a bicycle tube is a crucial skill for any cyclist. A flat tire is one of the most common problems you’ll encounter when riding, and being able to fix it yourself can save you time and money.

The process of replacing a bicycle tube is not difficult, but it does require a few specialized tools. You’ll need a tire lever, a patch kit, and a new tube. You may also want to have a pump handy to inflate the new tube.

Read more

Masterclass on How to Effortlessly Replace a Septic Tank

Masterclass on How to Effortlessly Replace a Septic Tank

Masterclass on How to Effortlessly Replace a Septic Tank

Replacing a septic tank is a crucial task for maintaining a properly functioning wastewater system. A septic tank is an essential component of an on-site wastewater treatment system, responsible for collecting and treating wastewater from a household or commercial building before releasing it into the environment.

Septic tanks require periodic replacement, typically every 15 to 20 years, to ensure optimal performance and prevent potential issues like backups, overflows, and environmental contamination.

Read more

The Ultimate Guide: How to Easily Replace Your Crankshaft Sensor

The Ultimate Guide: How to Easily Replace Your Crankshaft Sensor

The Ultimate Guide: How to Easily Replace Your Crankshaft Sensor

Replacing a crankshaft sensor is a critical task in automotive repair. The crankshaft sensor, also known as the crank sensor or engine speed sensor, is responsible for monitoring the crankshaft’s position and speed, providing this information to the engine control module (ECM). This data is essential for controlling fuel injection, ignition timing, and other engine functions.

A faulty crankshaft sensor can lead to various issues, including engine stalling, misfiring, and poor performance. Replacing the sensor is typically necessary when it fails or becomes damaged. This task requires a basic understanding of automotive mechanics and some specialized tools.

Read more